こんにちは。今回は、僕がコーディングしていて最近思うことを書き残しておきます。
タイトルの通りで、HTML要素は基本的にdisplay: blockないしはinlineが初期値になっていますがもう全部flexにしちゃった方が色々楽なんじゃないかという仮説です。
そもそもflexboxは、縦方向のレイアウトもできる
flexboxは要素の横並べに使われるというイメージが強いですよね。
しかし、厳密には「1次元のレイアウト」を行うためのものです。縦か横かは関係ありません。
縦か横かは、flex-directionというプロパティで決めます。flex-direction: row;(初期値)なら横方向、flex-direction: column;なら縦方向のレイアウトになります。
次の画像のようなレイアウトももちろん普通に要素を置けば実現できますが、flexでも可能ということです。
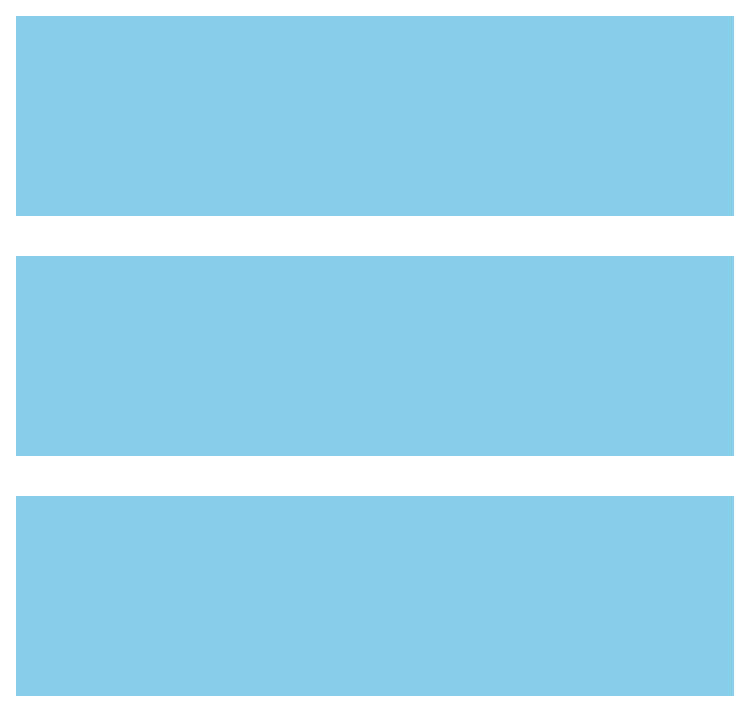
コードの例
.Container {
  width: 100%;
  display: flex;
  flex-direction: column;
  gap: 20px;
}
.Container-Item {
  width: 100%;
  height: 100px;
  background-color: #87ceeb;
}flexは中央寄せなどの配置が簡単
中央寄せ
まず中央寄せといえば、これまで様々な方法が議論されてきました。
- margin: auto;
- position: absolute; と translateを使った方法
- position: absoluete; とmargin: auto; を組み合わせた方法
- text-align: center;
- etc…
僕自身もこれらに関する記事はいくつか書いています。


しかし、これらの方法は要素がブロックなのかインラインなのかで使い分ける必要があったり、position: absolute;が絡んでくると要素が意図しない位置に飛んでいってしまうことがあるなど煩雑になりがちです。
display: flex; であればそういった煩わしさがありません。
親要素に、
.Parent {
  display: flex;
  justify-content: center;
  align-items: center;
}
と指定すれば何があろうと子要素は中央寄せになります。
具体例はこんな感じです。

<div class="Container">
  <div class="Container-Item"></div>
</div>
.Container {
width: 100vw;
height: 100vh;
display: flex;
justify-content: center;
align-items: center;
background-color: #eee;
}
.Container-Item {
width: 200px;
height: 200px;
background-color: #87ceeb;
}この例では.Container-Itemはブロックレベル要素ですが、テキストなどのインラインレベル要素でも構いません。
position: absolute;もありませんから、子要素が親要素をはみ出すこともありません。
9方向への配置
さらに justify-contentとalign-itemsの値の組み合わせで中央だけでなく9方向の配置が可能です。
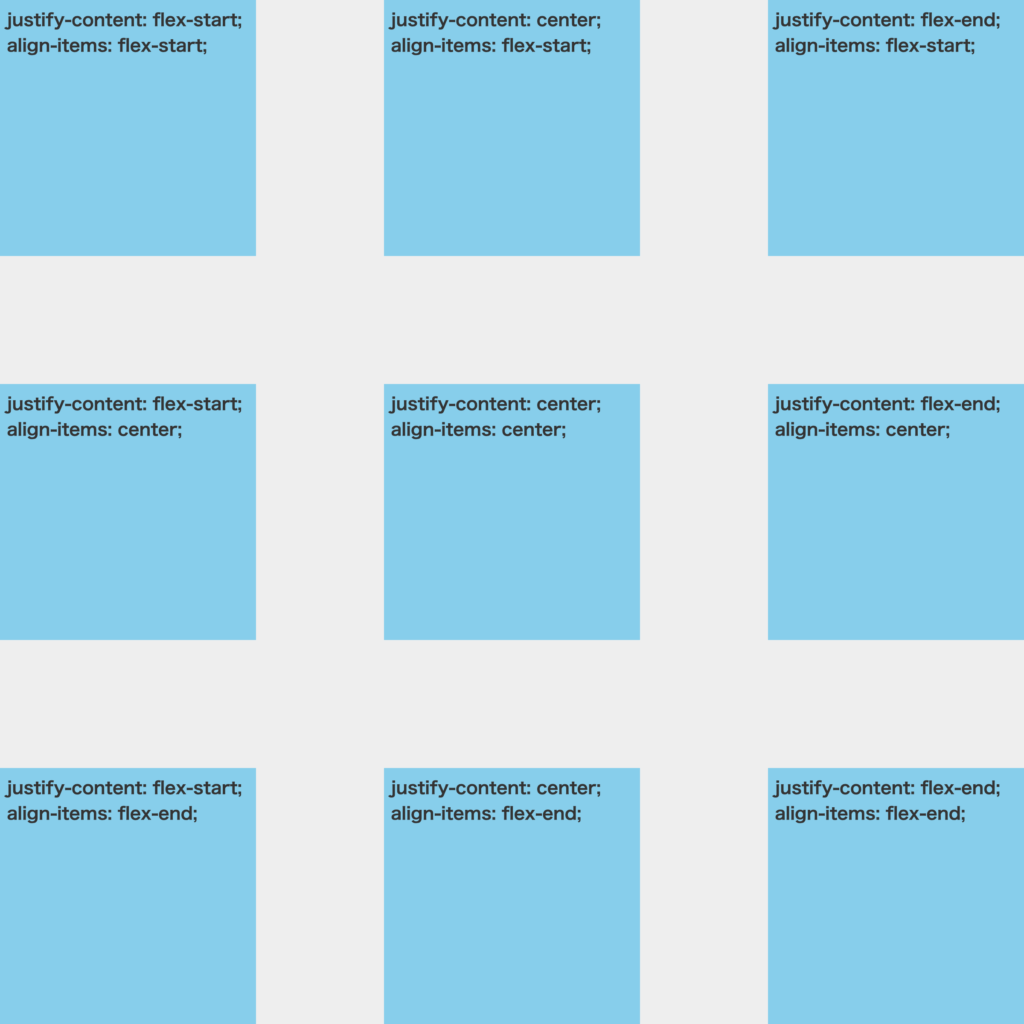
flex-startはその方向における先頭、flex-endはその方向における末尾、centerは中央に配置されますから、それぞれの組み合わせで3 × 3 = 9方向の配置になります。
縦方向レイアウトとの組み合わせ
また、縦方向のレイアウトと組み合わせるとこんな中央寄せも可能です。
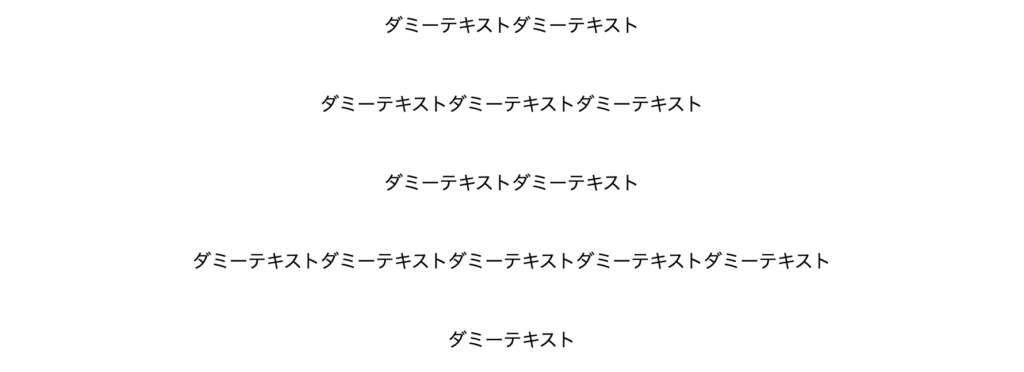
<div class="Container">
  <p class="Container-Text">ダミーテキストダミーテキスト</p>
  <p class="Container-Text">ダミーテキストダミーテキストダミーテキスト</p>
  <p class="Container-Text">ダミーテキストダミーテキスト</p>
  <p class="Container-Text">
    ダミーテキストダミーテキストダミーテキストダミーテキストダミーテキスト
  </p>
  <p class="Container-Text">ダミーテキスト</p>
</div>
.Container {
width: 100%;
display: flex;
flex-direction: column;
align-items: center;
gap: 50px;
}親要素にこのような指定をすれば、子要素それぞれに何も指定しなくても全て中央揃えになります。
flexは余白の扱いも簡単
ここまでの例でもしれっと使っていましたが、gapプロパティを使うことで余白の扱いも簡単になります。
例えばこんなレイアウトで、「1番目の要素だけmarginがいらない」という時ってありますよね。
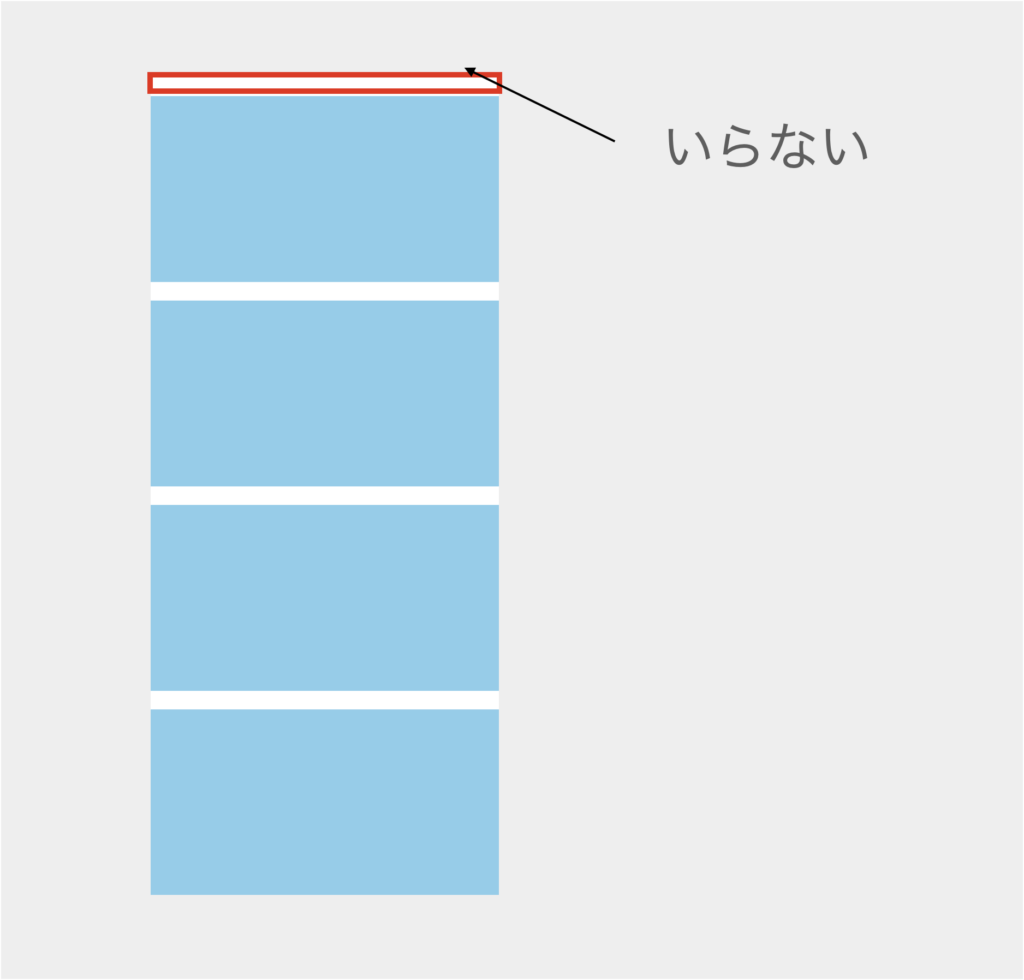
このようなケースでは、例えばfirst-childなどの擬似セレクタを使って打ち消したり、あるいはフクロウセレクタ(https://eclair.blog/usage-owlselector-in-css/)という特殊な書き方を使って回避していました。
しかし、gap(column-gap/row-gap)プロパティというそもそも要素間の余白を定義するためのものがあるわけです。それを使えばよりシンプルに書けます。
.Container {
  width: 100%;
  display: flex
  flex-direction: column;
  gap: 20px;
}
これならどれにmarginをつけてどれを打ち消すか、など考える必要がありません。
余白についての考え方をもっと詳しく知りたい方はこちらをご覧ください。
実践でどのように使うかのデモ
デモとして、CodeStepさんのこちらの1番のデザインカンプ(https://code-step.com/xd-public/)をお借りしました。
デモページはこちらです。PC版のみですが確認してみてください。(https://itokoba.com/demos/flex-sample/)
またリセットCSSとしてはdestyle.cssを用いています。(https://github.com/nicolas-cusan/destyle.css/blob/master/destyle.css)
コードは以下です。
<!DOCTYPE html>
<html lang="ja">
  <head>
    <meta charset="UTF-8" />
    <meta http-equiv="X-UA-Compatible" content="IE=edge" />
    <meta name="viewport" content="width=device-width, initial-scale=1.0" />
    <title>Document</title>
    <link rel="stylesheet" href="./destyle.css" />
    <link rel="stylesheet" href="./style.css" />
  </head>
  <body>
    <header class="Header">
      <div class="Header__Inner">
        <h1 class="Header-Logo">
          <img
            src="./images/logo.svg"
            alt="profile"
            class="Header-Logo-Image"
          />
        </h1>
        <nav class="Header-Nav">
          <ul class="Header-Nav-List">
            <li class="Header-Nav-List-Item">
              <a href="#" class="Header-Nav-List-Item-Link">About</a>
            </li>
            <li class="Header-Nav-List-Item">
              <a href="#" class="Header-Nav-List-Item-Link">Bicycle</a>
            </li>
          </ul>
        </nav>
      </div>
    </header>
    <section class="Firstview">
      <img
        src="./images/mainvisual.jpg"
        alt=""
        class="Firstview-Image"
        width="1920"
        height="1280"
      />
    </section>
    <main class="Main">
      <div class="Main__Inner">
        <section class="About">
          <h2 class="About-Headline">About</h2>
          <div class="About-Content">
            <img
              src="./images/about.jpg"
              alt=""
              class="About-Content-Image"
              width="640"
              height="640"
            />
            <div class="About-Content__Right">
              <h3 class="About-Content-Headline">KAKERU MIYAICHI</h3>
              <p class="About-Content-Text">
                テキストテキストテキストテキストテキストテキストテキストテキストテキストテキストテキストテキストテキストテキストテキストテキストテキストテキストテキストテキストテキスト
              </p>
            </div>
          </div>
        </section>
        <section class="Bicycle">
          <h2 class="Bicycle-Headline">Bicycle</h2>
          <ul class="Bicycle-List">
            <li class="Bicycle-List-Item">
              <article class="Bicycle-List-Item-Card">
                <img
                  src="./images/bicycle1.jpg"
                  alt=""
                  class="Bicycle-List-Item-Card-Image"
                  width="640"
                  height="424"
                />
                <h3 class="Bicycle-List-Item-Card-Headline">
                  タイトルタイトル
                </h3>
                <p class="Bicycle-List-Item-Card-Text">
                  テキストテキストテキスト
                </p>
              </article>
            </li>
            <li class="Bicycle-List-Item">
              <article class="Bicycle-List-Item-Card">
                <img
                  src="./images/bicycle2.jpg"
                  alt=""
                  class="Bicycle-List-Item-Card-Image"
                  width="640"
                  height="424"
                />
                <h3 class="Bicycle-List-Item-Card-Headline">
                  タイトルタイトル
                </h3>
                <p class="Bicycle-List-Item-Card-Text">
                  テキストテキストテキスト
                </p>
              </article>
            </li>
            <li class="Bicycle-List-Item">
              <article class="Bicycle-List-Item-Card">
                <img
                  src="./images/bicycle3.jpg"
                  alt=""
                  class="Bicycle-List-Item-Card-Image"
                  width="640"
                  height="424"
                />
                <h3 class="Bicycle-List-Item-Card-Headline">
                  タイトルタイトル
                </h3>
                <p class="Bicycle-List-Item-Card-Text">
                  テキストテキストテキスト
                </p>
              </article>
            </li>
          </ul>
        </section>
      </div>
    </main>
    <footer class="Footer">© 2020 Profile</footer>
  </body>
</html>
body * {
  display: flex;
  flex-direction: column;
  font-family: Arial;
  color: #383e45;
}

img {
  display: block;
  width: 100%;
  height: auto;
}

.Header {
  width: 100%;
  height: 60px;
  justify-content: center;
  align-items: center;
}

.Header__Inner {
  width: 100%;
  max-width: 960px;
  padding-left: 70px;
  padding-right: 70px;
  flex-direction: row;
  justify-content: space-between;
}

.Header-Logo {
  width: 120px;
  height: 40px;
}

.Header-Logo-Image {
  width: 100%;
  height: 100%;
}

.Header-Nav {
  height: 100%;
}

.Header-Nav-List {
  height: 100%;
  align-items: start;
  flex-direction: row;
  gap: 30px;
}

.Header-Nav-List-Item {
  height: 100%;
}

.Header-Nav-List-Item-Link {
  height: 100%;
  justify-content: center;
  font-size: 14px;
}

.Firstview {
  width: 100%;
  height: 600px;
}

.Firstview-Image {
  width: 100%;
  height: 100%;
  object-fit: cover;
}

.Main {
  width: 100%;
  align-items: center;
}

.Main__Inner {
  width: 100%;
  max-width: 960px;
  padding-top: 80px;
  padding-bottom: 110px;
  padding-left: 70px;
  padding-right: 70px;
  gap: 96px;
}

.About {
  width: 100%;
  align-items: center;
  gap: 66px;
}

.About-Headline {
  border-bottom: 1px solid #383e45;
  font-size: 32px;
  line-height: 37px;
  color: #383e45;
  font-weight: bold;
}

.About-Content {
  width: 100%;
  max-width: 527px;
  flex-direction: row;
  gap: 30px;
}

.About-Content-Image {
  border-radius: 50%;
  width: 100px;
}

.About-Content__Right {
  flex: 1;
  gap: 10px;
}

.About-Content-Headline {
  font-weight: bold;
}

.About-Content-Text {
  font-size: 14px;
  line-height: 25px;
}

.Bicycle {
  width: 100%;
  align-items: center;
  gap: 60px;
}

.Bicycle-Headline {
  border-bottom: 1px solid #383e45;
  font-size: 32px;
  line-height: 37px;
  color: #383e45;
  font-weight: bold;
}

.Bicycle-List {
  width: 100%;
  flex-direction: row;
  gap: 16px;
}

.Bicycle-List-Item {
  flex: 1;
}

.Bicycle-List-Item-Card {
  width: 100%;
  align-items: center;
  gap: 10px;
}

.Bicycle-List-Item-Card-Image {
  width: 100%;
}

.Bicycle-List-Item-Card-Headline {
  font-weight: bold;
}

.Bicycle-List-Item-Card-Text {
  font-size: 14px;
}

.Footer {
  width: 100%;
  padding-bottom: 10px;
  align-items: center;
}
僕自身もまだ試行錯誤中ではありますが、今回は試しに全要素の初期値として、
body * {
  display: flex;
  flex-direction: column;
  /* 省略 */
}を指定してみました。結果としてmarginを一切使わずにコーディングを行うことになりました。
もちろん全ての要素をdisplay: flex;にすることを推奨する訳ではないですし、marginを使うことを否定する訳でもないです。
また、3つ以上並んだ各要素間の余白が同じでなければいけないのでそもそも使えないというケースも多くあるでしょう。
それでもflexにすればスムーズな部分もやはり多いなという印象です。
まとめ
というわけで、flexboxについて色々考えてみました。全部flexといってもgridの方が適している場合もありますし、やはり全部display: flex;だと困ることもいくつかありそうです。
それでも、これまでCSSのテクニックとされていたことの多くは実はもう必要無くもっと簡潔に書けるケースも多々あるということも分かりました。
みなさんもぜひ新しいプロパティに出会うたびに、これまで常識だとされていたこと疑ってみてください。
もっといい方法が見つかるかもしれません。
こういったテクニックをもっと知ってレベルアップしたい方はぜひこちらの本で勉強してみてください!




コメント